Are you a big fan of lotion bars Lush makes and sells? Do they eat your budget but nourish your skin?
Guess what! I’ll show you how to make your own lotion bars with an easy recipe, that’s beginner-proof too! With a handful of ingredients, you can make body butter bars and nourish your skin in the cold months.
What’s more, these make a lovely gift and are budget-friendly too!

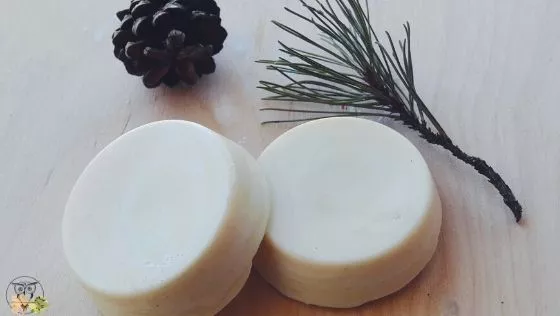
Today, we’re continuing the arctic series of recipes. we’re making a gorgeous body lotion bar recipe! The final product melts when it comes into contact with skin, smells divine, and leaves the skin soft, smooth and nourished. For an extra kick of glow, we’re adding pearl mica powder to the mix!
Thanks to cetyl alcohol, this butter bar applies nicely, has a lovely slip, and it soaks into the skin well.
I can’t get enough of these bars; I’ve been voluntarily testing too many of them, so I finally decided to share the recipe with you. Apart from this vegan body lotion bar recipe, you can also find other recipes in this Arctic series here:
We’re using the same ingredients as in other recipes, so this body bar nicely complements those recipes and enables you to stay on the budget while making the recipes from the series.
This lotion bar is smooth and soft. It melts in the contact with skin, but it stays firm on room temperature! If you’re using them as gifts, I suggest packaging a few into a dry clean jar to keep them from dirt and hair sticking to them. Adding a ribbon to the jar makes them look as the perfect present material.
Vegan
Easy to make
Require a handful of ingredients
Make great gifts
Smell lovely!
Make great Christmas stocking fillers!
What is a solid lotion bar?
A solid lotion bar is basically a lotion that’s solid at room temperature. They are an excellent alternative to body butters and normally very nourishing.
These lotion bars are more of body butter bars they don’t contain any water-based ingredients. If you want to know more about the difference between a body butter and a lotion, head to my body butter info article.
How do you make lotion bar?
To make a lotion bar, you’ll need some oils, some butters, a wax, and essential oils.
First of all, here’s how you do it:
- Melt the ingredients
- Stir in essential oils
- Pour into molds and let them solidify!
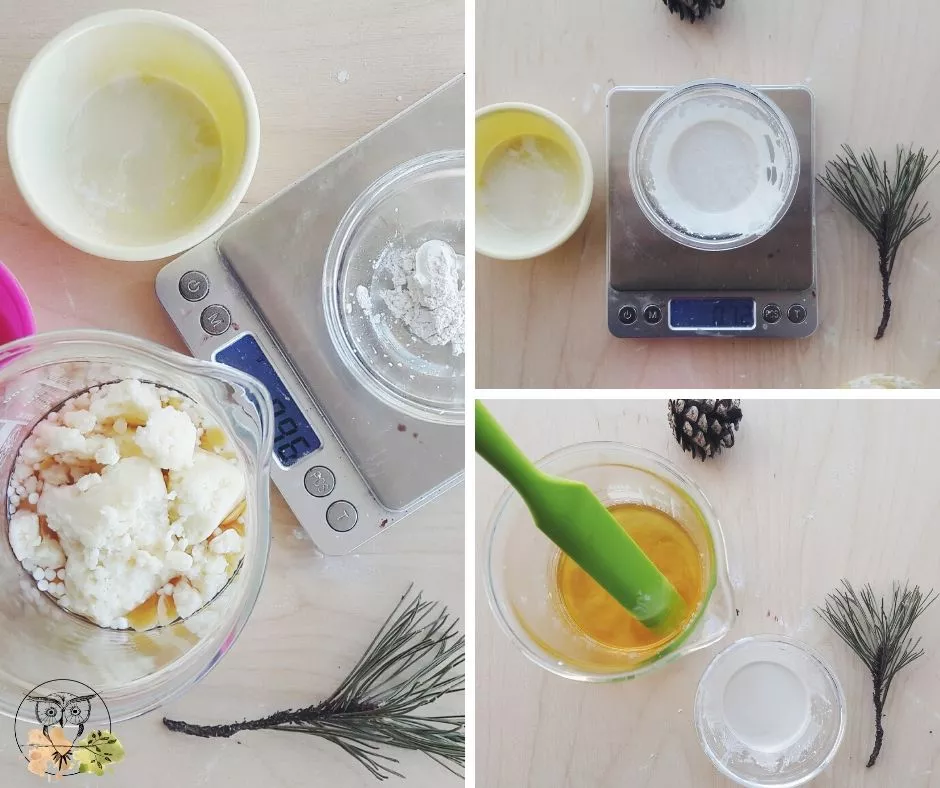
First, we combine solid ingredients and put them into a heat-proof beaker. We wait until they’re completely melted.

In a separate jar, we mix the mica with a bit of oil and stir well, until it’s well dispersed.

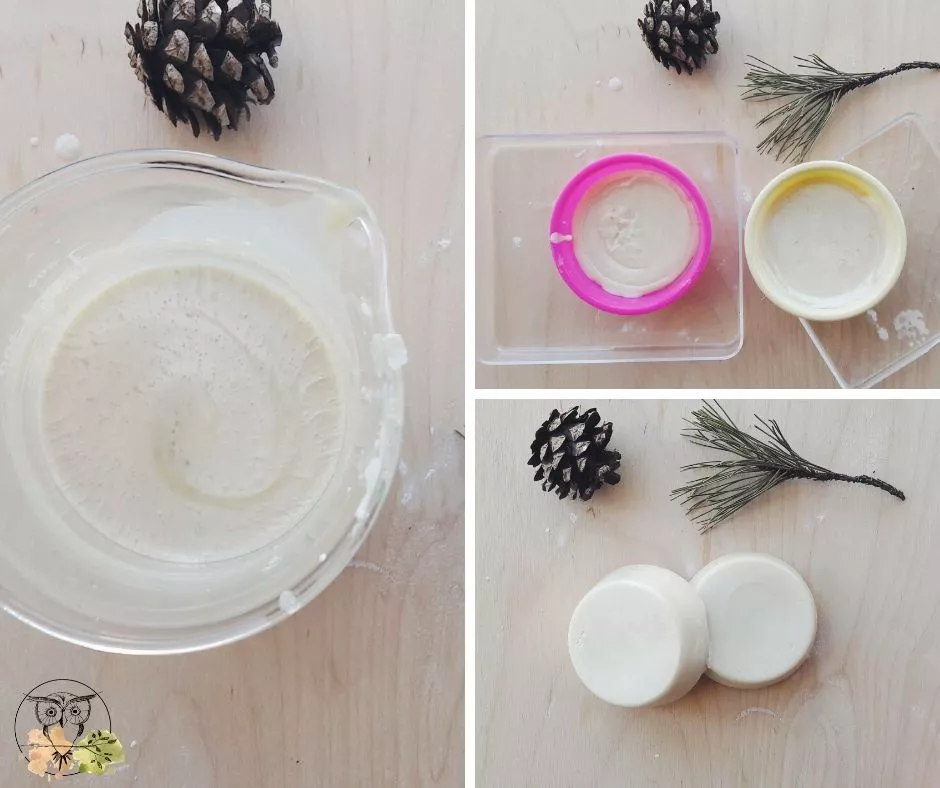
When the ingredients melt, we add mica in oil to them, stir well and pour it into molds. We let the lotion bars to settle. It’ll take some time, depending on your room temperature. I leave them to set overnight and pop them from the molds in the morning.
To make the bars last longer, we’ll also add a few drops of vitamin E oil into the mix. It helps to prolong the shelf life of the oils and it’s also great for the skin.
Also when using these bars, make sure to apply them with dry hands on dry skin. They don’t contain any preservatives and putting them into contact with water will cause the bars to grow nasties. If you think they will come into contact with water, consider adding a preservative to the mix. You’ll need an oil-soluble one if you want it to be effective.
The essential oil blend is the same thought out this arctic series. I combined orange essential oil for an uplifting scent that reminds me of winter and December, a bit of clove and cardamom essential oils to make the blend spicy yet sweet. Just like a dark winter night (or how I like to believe). It makes the bars smell amazing!
Overall, the recipe makes 2 bars of about 40g each. You can easily double the recipe and also use a different mold; just use whatever you have on hand. Silicone molds work best as it’s easy to pop these beauties out once they’re solid.
Ready? Let’s head over to lotion bar recipe without beeswax!
Illuminating Arctic Body Lotion Bar Recipe
Ingredients:
- 35g cupuacu butter
- 30g macadamia nut oil
- 13g candelilla wax
- 5g cetyl alcohol
- 1g white pearl mica powder
- 0.6g orange essential oil
- 0.3g cardamom essential oil
- 0.1g clove essential oil
- A few drops vitamin E oil
Process:
- Prepare a water bath: add 3cm/1” of water to a wide pan. Bring the water to simmer (low-medium heat).
- Weigh and combine 5g macadamia oil with mica powder. Stir well until mica is dispersed thoroughly. Set aside
- In a heat-proof beaker, weigh and combine cetyl alcohol, cupuacu butter, candelilla wax, and macadamia nut oil
- Place it into the water and let the ingredients melt completely; it’ll take about 20 minutes
- When all has melted, pour the mica in oil in the beaker. Stir well until it’s all evenly distributed
- Add essential oils and vitamin E oil
- Pour the mixture into the molds
- Let them set for a couple of hours or overnight
- Pack them into a clean, dry jar
- To use, massage your skin with the bar; it melts when it comes into contact with skin!
Notes:
- You can change essential oils to a different blend if you so prefer
- Mica powder is optional, but it adds a lovely glowing tone to the skin. You can substitute pearl mica for a different color; bronze and gold would make lovely options too!
- Add a bit of starch (such as tapioca starch or cornstarch) into the recipe to additionally minimize the greasy feeling
Do lotion bars need preservatives?
Lotion bars are oil-based products. We use butters and carrier oils to make them without any water-based ingredients. They don’t need a preservative, but it’s good to add a few drops vitamin E oil, to prolong the shelf-life of the oils. Just make sure to use them on dry skin with dry hands, without any contact with water.
In the case these butter bars come into contact with water, they’ll start growing bacteria and other nasties you don’t want there. If you can’t prevent them from coming into contact with water, you should add a preservative to them. You’ll need a preservative that’s oil-soluble for it to protect the lotion bars properly.
How much essential oil do you put in lotion bars?
To keep this product safe for skin, consider a max of 2% dilution. That is the standard when it comes to these ratios. See here how to safely combine essential with carrier oils for more info.
I decided to keep the amount of essential oils to 1 percent when making these butter bars. I wanted them to have a pleasant scent, but not an overwhelming one.
How to make lotion bars non greasy?
Any recipe that’s based on oils and butters without water, is greasy. But the good news is, you can do something about that!
You can easily minimize the greasy feeling of these bars easily by adding cornstarch, arrowroot powder or tapioca starch into the mix. You can see an example in my cardamom body butter here.
Simply add a small amount (up to 5g) of a starch to the recipe and stir well, until it’s evenly incorporated. I suggest you add it to the mixture once all the solid ingredients have melted, but before you pour in mica dispersed in oil. Stir well and the butter bars will be less greasy.
I have reduced the feeling of greasiness in the recipe by including cetyl alcohol. It’s a fatty alcohol that’s versatile and easy to work with. It leaves a lovely finish on the skin. It’s a thickener that helps to harden these bars without adding an additional feeling of grease.
How to package lotion body bar?
The best way to package body butter bars is by keeping them in a dry clean container with a lid. They love to pick up dirt, hair, and dust. To apply a hairy dusty looking mess is pretty yucky. Store them in a jar before and after use, somewhere away from a heat source or direct sunlight so that they don’t turn back into their liquid form.
Stay Wild!
-Kat

Have you made this fragrant lotion bar recipe? Tag us on Instagram #wildfordiy
Help support Wild for Nature
Many of you have asked if there’s a way to help support Wild for Nature. I’ve signed up for Buy Me Coffee. If you love what I do, learn from me, sell anything you made from my recipes, and want to see Wild for Nature grow even more, I’d be thrilled if you’d consider buying me a coffee! It works as a one-time or a monthly donation of $3. You can also get beautifully designed PDFs with a series of recipes and other resources I publish there, to help you learn and get creative at home! I can then use that money to further develop and grow Wild for Nature and you can help me continue with wild creations and resources!
